Plan Before You Build
Before placing your first block, decide on the size, style, and shape of your build. Use dirt or wool blocks to outline the footprint on the ground. This helps you get proportions right before committing to expensive materials. Our tutorials include materials lists so you can plan your resource gathering.
Use Block Palettes
The best Minecraft builds use a consistent color palette of 3-5 block types. For medieval builds, try stone bricks, oak wood, and cobblestone. For modern houses, use white concrete, gray concrete, and glass. Mixing too many block types makes builds look messy, while too few makes them look flat.
Add Depth and Detail
Flat walls look boring. Push windows back by one block, add pillars that stick out, use stairs and slabs to create overhangs and ledges. Even adding trapdoors as shutters or buttons as doorknobs adds visual interest. The key is varying the surface depth so light creates natural shadows.
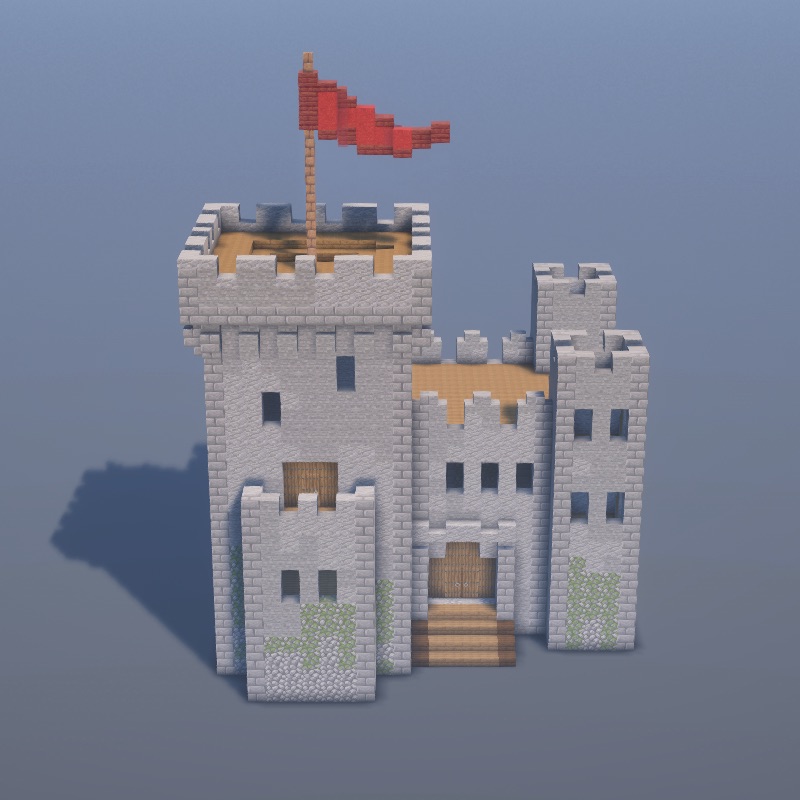
Master Roof Design
The roof makes or breaks a build. Avoid flat roofs on medieval and rustic builds. Use stairs for sloped roofs, and add overhangs of 1-2 blocks beyond the walls. Mix in slabs for a less steep pitch. For larger builds, try combining multiple roof sections at different heights for a more complex silhouette.
Landscaping Matters
Your build doesn't end at the walls. Add paths using gravel or coarse dirt, plant trees and flowers, build fences and walls around the property. Use slabs and stairs to create terrain variation. A well-landscaped build looks 10x better than the same build plopped on flat ground.
Light Your Builds Properly
Lighting prevents mob spawns and sets the mood. Use lanterns for rustic builds, sea lanterns or end rods for modern ones. Hide glowstone under carpet or behind paintings for hidden lighting. Outdoor builds benefit from lampposts and path lighting. Avoid placing torches randomly on walls.
Build to Scale
Minecraft characters are about 2 blocks tall. Keep doorways 2-3 blocks high, ceilings 3-4 blocks high, and rooms at least 4x4 blocks for furniture. Going too big makes builds feel empty; too small makes them cramped. When in doubt, follow our tutorials which have already figured out the perfect proportions.
Furnish Your Interiors
Empty rooms ruin the immersion. Use stairs as chairs, slabs as tables, trapdoors as cabinets, and banners as decoration. Bookshelves, flower pots, and item frames add life to rooms. Each room should have a clear purpose: bedroom, kitchen, storage, or workshop.
Use Reference Images
Look at real architecture for inspiration. Gothic cathedrals, Japanese temples, modern villas, and rustic cabins all have distinct features you can translate into Minecraft. Our step-by-step tutorials serve as visual references, showing you exactly how to recreate specific styles block by block.
Practice with Small Builds First
Don't start with a massive castle. Begin with a small house, a fountain, or a market stall. Small builds teach you the fundamentals of shape, proportion, and detail that scale up to larger projects. Check our easy builds section for great starter projects.
Experiment in Creative Mode
Use Creative Mode as your testing ground. Fly around to see your build from all angles, try different block combinations, and don't be afraid to tear things down and rebuild. Once you're happy with a design, you can recreate it in Survival Mode with confidence.
Add Water Features
Water adds movement and life to any build. A simple pond, a waterfall flowing off a cliff, or a moat around a castle can dramatically improve the look. Use glass to create aquariums, or build bridges over rivers. Water also reflects light beautifully with shaders.